PayPal Integration Guide
All of our Camping Connect Wi-Fi systems have the ability to generate revenue through the use of PayPal integrations. Customers/Guest can purchase Wi-Fi using an existing PayPal account or a one-time purchase using a credit or debit card. To enable PayPal integration with your Wi-Fi system you will need to perform a number of quick steps and pass the information you receive back to Camping Connect for them to do the rest of the work.
Setting up PayPal
Follow the guide on PayPal’s website.
Step 1 – Setting up PayPal for website payments
1.1 – Login into your existing PayPal account and click the cog button in the top right of the page. Then select ‘Account Settings’.

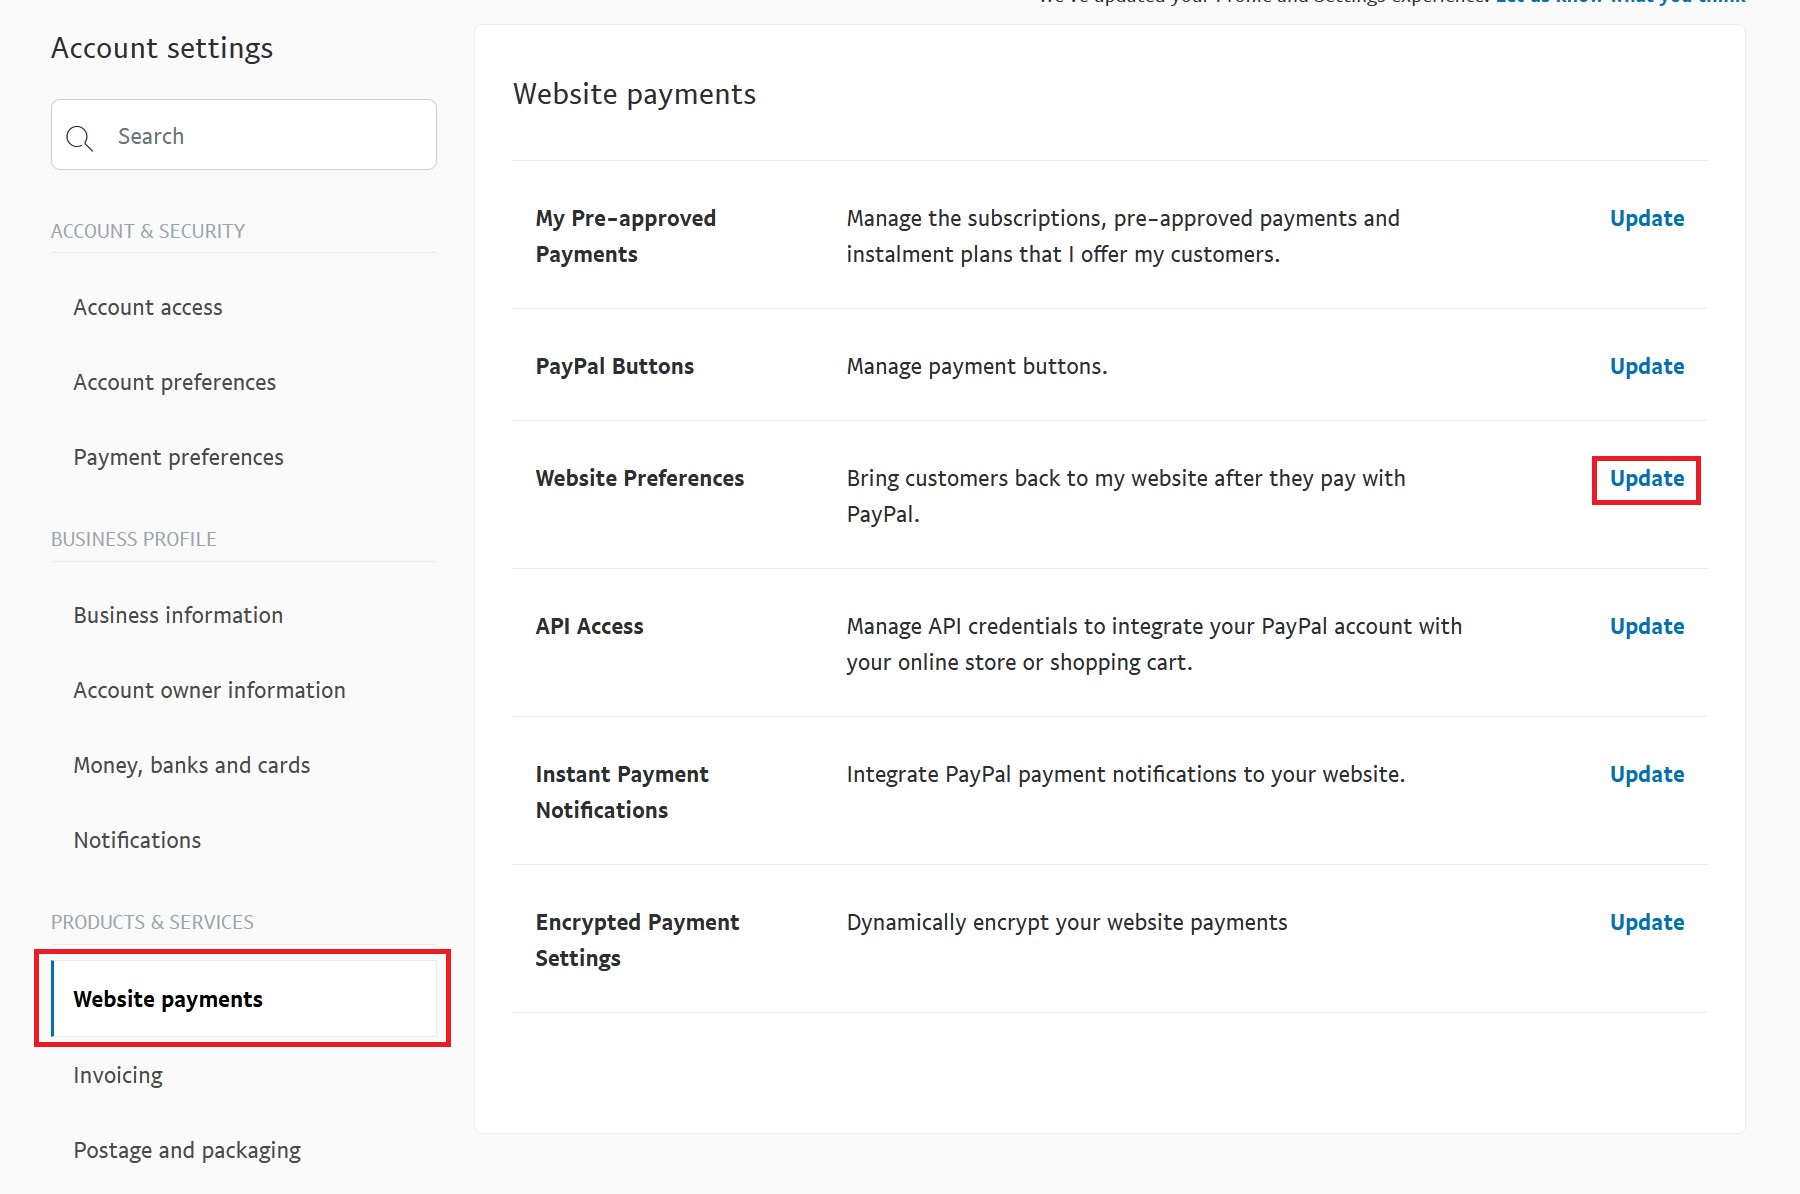
1.2 – Select ‘Website Payments’ then ‘Update’ in Website Preferences
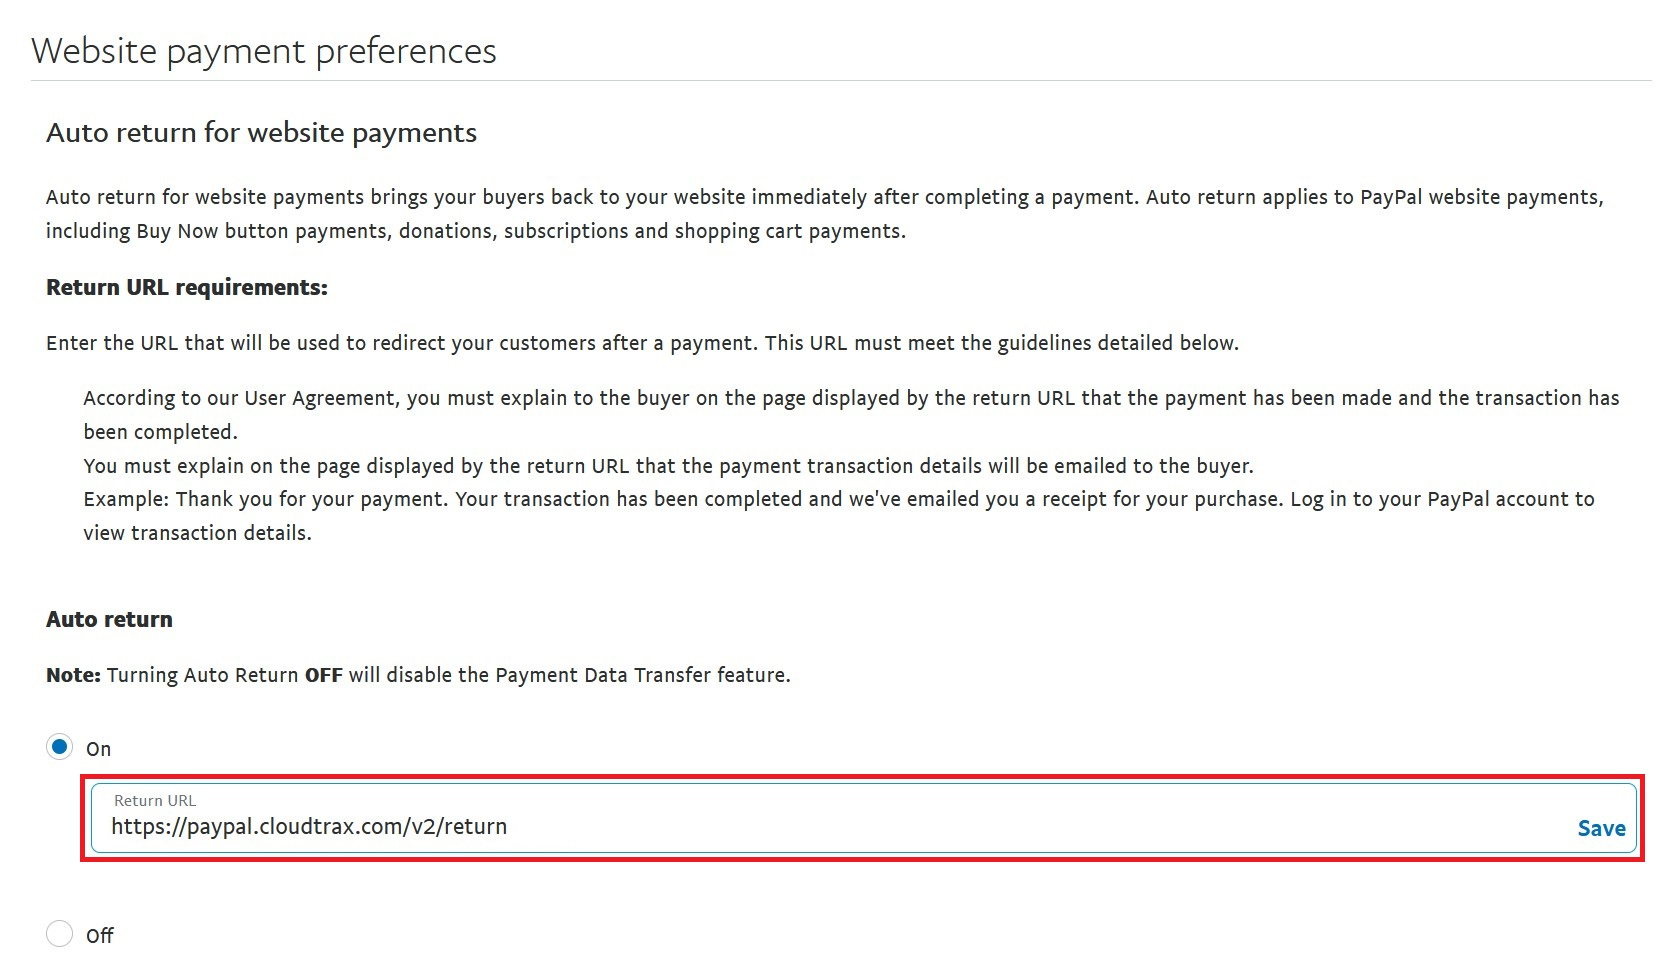
1.3 – Under ‘Auto Returns for Website Payments’, ensure that Auto-returns is ‘On’. Then set the Return URL to be: https://paypal.cloudtrax.com/v2/return
1.4 – Under ‘Payment Data Transfer’, ensure that the Payment Data Transfer is ‘On’. Once this is enabled you will be given an ‘Identity Token’. Keep a copy of this token as we will be using it later on!

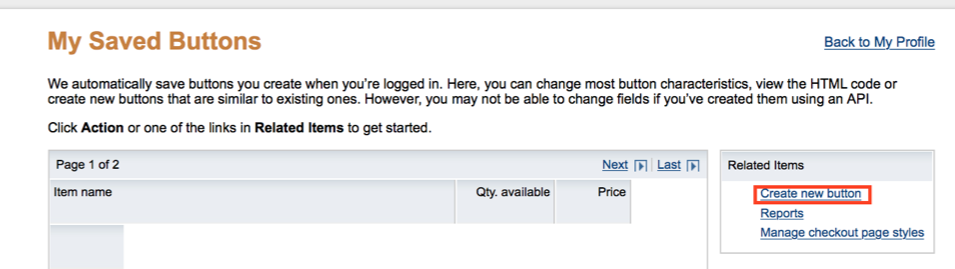
Step 2 – Creating a Payment Button
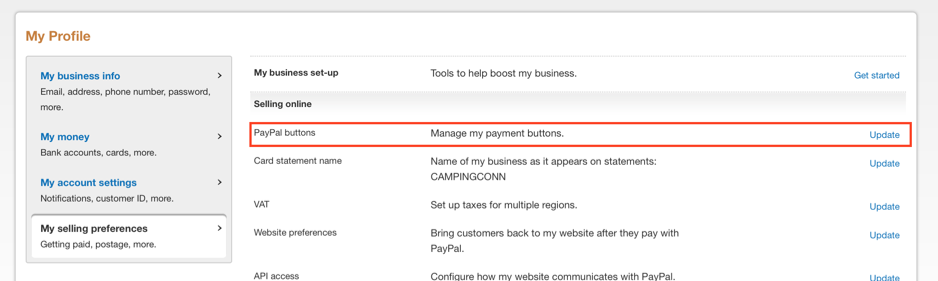
2.1 – Navigate to your ‘My selling preferences’ page using Step 1 of this guide. Then select the ‘Update’ button for PayPal buttons.
2.2 – To the right of the pre-existing buttons. Click ‘Create a new button’.
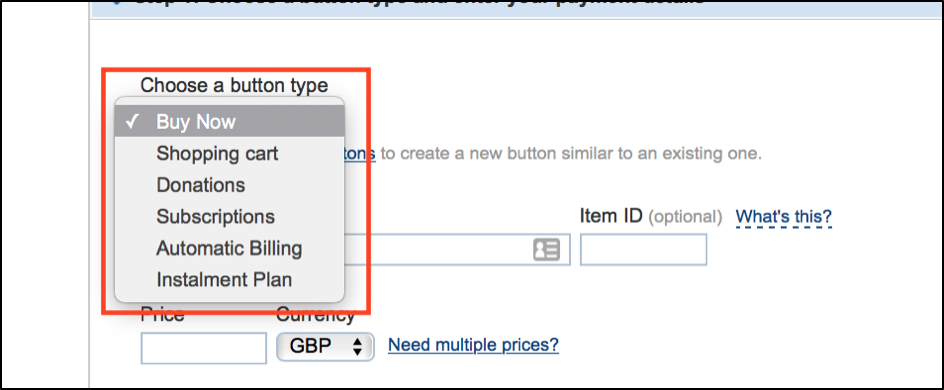
2.3 – Change the dropdown button menu ‘button type’ and select ‘Buy Now’
2.4 – Enter your business name into the ‘Item Name’ field, e.g. Camping Connect.

2.5 – Enter your network code into the ‘Item ID’ field. This code will be provided at the start of this guide.

2.6 – Select the checkbox for the ‘Add a drop-down menu with a price/option’.
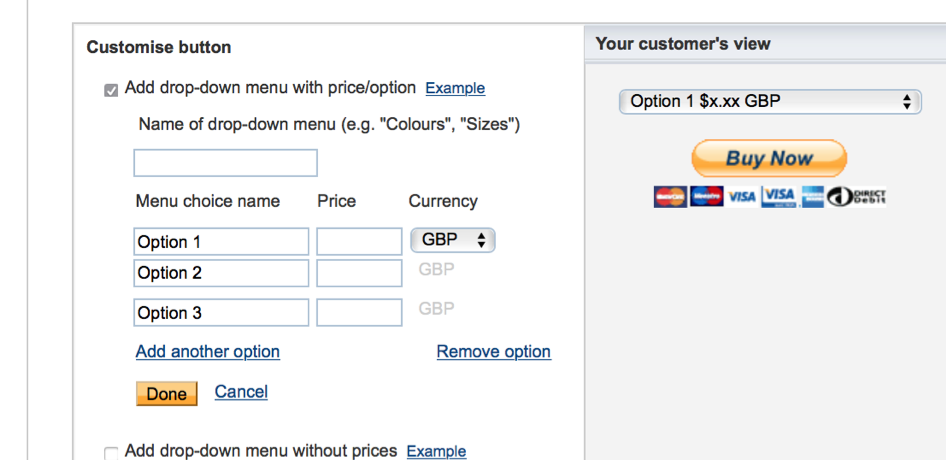
2.7 – You will now be able to set the option values and prices. An example of some options include:
- 24 Hours (1 Device) – £4.20
- 3 Days (2 Devices) – £7.00
- 1 Month (4 Devices) – £20.00
Feel free to create the options/prices as you wish.
2.8 – Click ‘Step 3: Customise advanced features (optional)’.

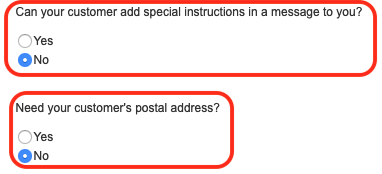
2.9 – Select the “No” Checkbox for the following questions
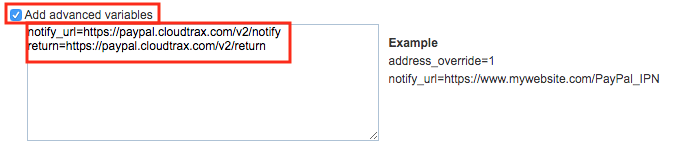
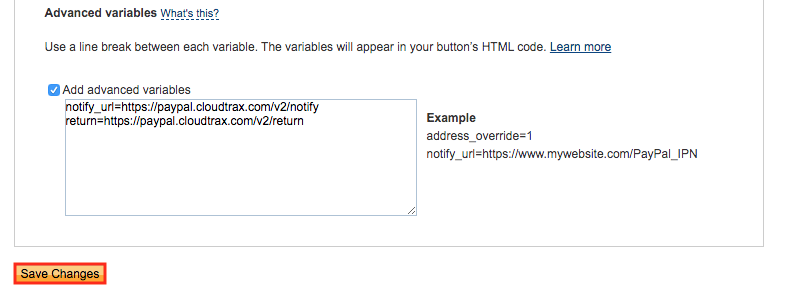
2.10 – Select the check box next to ‘Add advanced variables’. Then enter ‘notify_url=https://paypal.cloudtrax.com/v2/notify’ and ‘return=https://paypal.cloudtrax.com/v2/return’ into the box.
2.11 – Click the ‘Save Changes’ or ‘Create Button’ button.
2.12 – Copy and paste the returned HTML code into an email for Camping Connect.
Step 3 – Setting up API access for Multi Device Packages
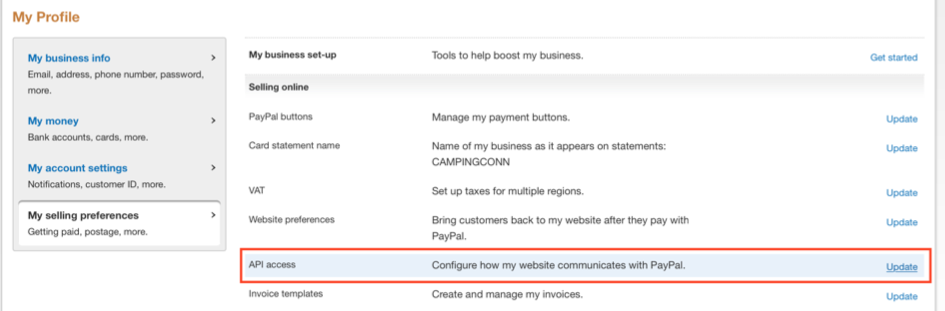
3.1 – Navigate to your ‘My selling preferences’ page using Step 1 of this guide. Then select the ‘Update’ button for API Access.
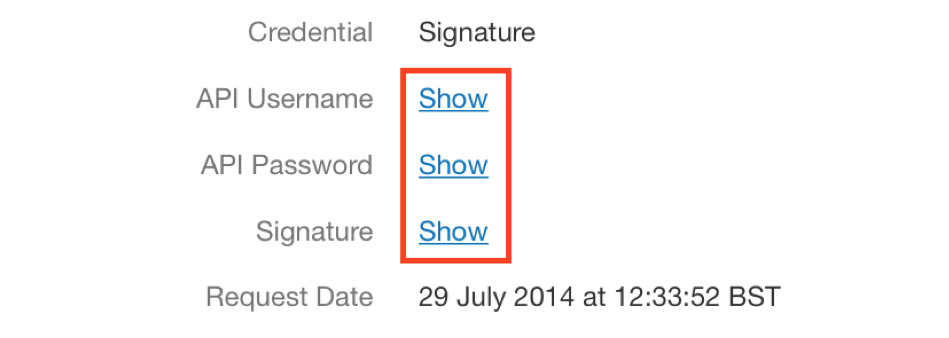
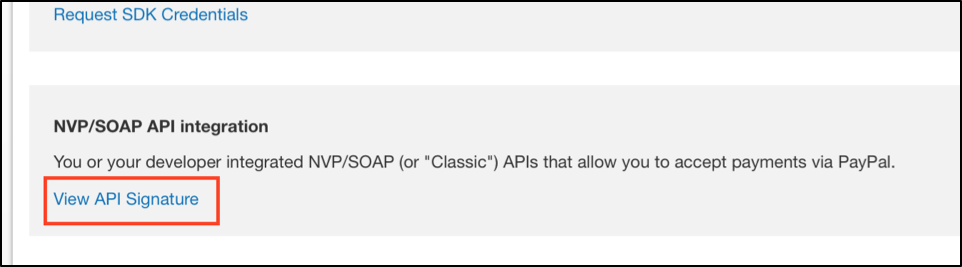
3.2 – Click ‘View API Signature’ underneath the NVP/SOAP integration heading.
3.3 – Click every ‘Show’ button next to API Username, API Password, and Signature. Copy and paste the details that are shown and email them over to Camping Connect.