
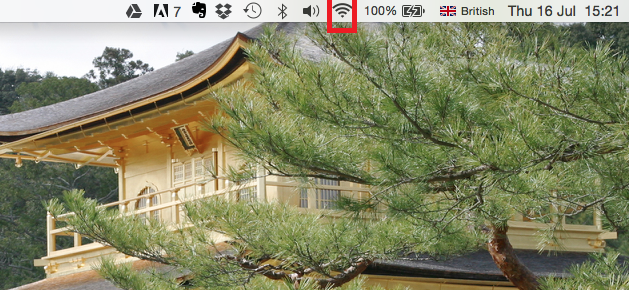
- Ensure that the WiFi is enable. You can do this by clicking the WiFi symbol in the system tray at the top of the screen. This will display an option to turn the WiFi on/off and display the available networks.

- Select the appropriate network.

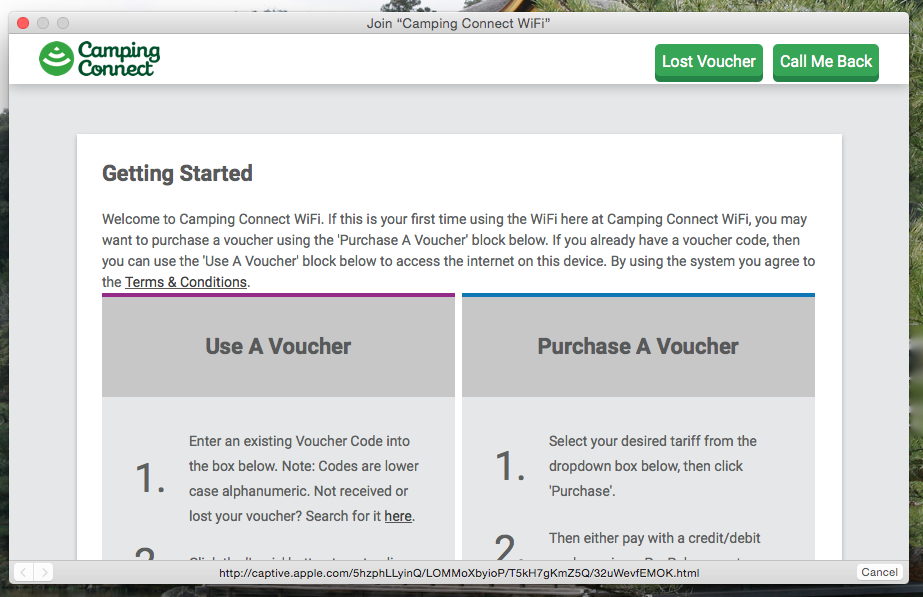
- The Mac should recognize the WiFi network as a public hotspot, and window with the splash page should pop up. If the splash page doesn’t appear, open a web browser and try loading a new web page (http://wifi-login.co.uk).
- You should now see the splash page where you can log onto the internet.
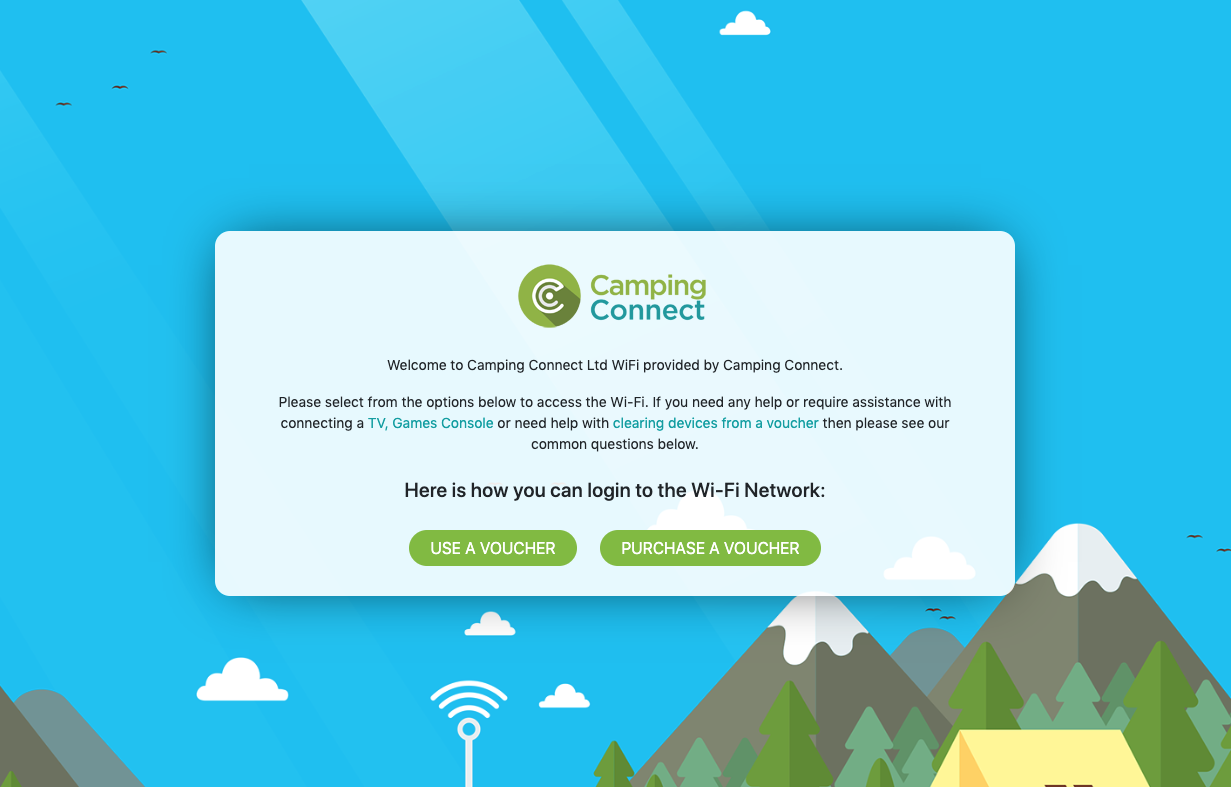
- A guide on purchasing a voucher code is available here. (note: some WiFi networks have free access and do not require a voucher code for internet access. Please see the splash page for more information.)

Troubleshooting
It is possible that you’re being redirected from an HTTPS page (such as Google or Facebook), you need to be accessing a HTTP webpage to be redirected (wifi-login.co.uk is a HTTP page). If this is the case the splash page will not be able to load. To work around this problem simply:
- Open your preferred choice of Internet browser.
- In the address bar type ‘www.wifi-login.co.uk’ . This is an example of a regular HTTP page that will allow you to be redirected to the splash page
If you are still not redirected to the splash page, you may have some static IP settings set up on your Mac. These are sometimes required for business/office networks but will stop you connecting to any other networks such as public hotspots. Providing you make a note of anything you change, it shouldn’t be a problem changing these settings.
To check that your settings are set to automatic:
- Click on the wireless icon at the top right of your screen and select Open Network Preferences.
- Click Airport from the left hand side and then Advanced
- Click on the TCP/IP tab
- Configure IPv4: If this is set to anything other than Using DHCP, make of your IP address, subnet mask and gateway as you will probably need to change these settings back when you return to work or home.
- Change Configure IPv4 to Using DHCP
- Click on the DNS tab and make a note of any DNS addresses that you have in the list and then remove them using the – (hyphen) button at the bottom of the list. It is normal to have one DNS address in the list that appears greyed out. This is provided by our system automatically when connecting to our network.
- Now click on OK and close any open windows
- Open your Internet browser and try again.